All my life I've been a tinkerer, a customizing aficionado, and because of that, of course a lot of my hobbies fall into that zone. If I can put my own unique stamp on something, I like it all the more.
 |
| The unsuspecting subject of my plans. My Nissan Frontier center console panel. |
With every vehicle I've ever owned, I always had an inkling to make it uniquely my own. But not always by dropping thousands of dollars on custom wheels, or huge stereo components. For a long while I kept this truck, which I got back in 2006, for the most part stock looking.
But my dash had gotten a stress crack in the area right by the right hand corner of the radio bevel edging, so I figured if I was going to get this dashboard apart to fix that crack, why not go a bit further with it and see if I could incorporate my two favorite colors into it, black and green.
 |
| Thankfully it's just a couple of easy to remove connections for the front panel and one central screw up top. |
 |
| I started by painting the tray a semi gloss black (you can see the end result in the last photo) and left the drop in liner it's natural gray so it would lock in the colors better visually. I also fashioned a paint drying/spraying hook out of a spare wire hanger I had so that I could leave this to dry through the evening in the basement. |
 |
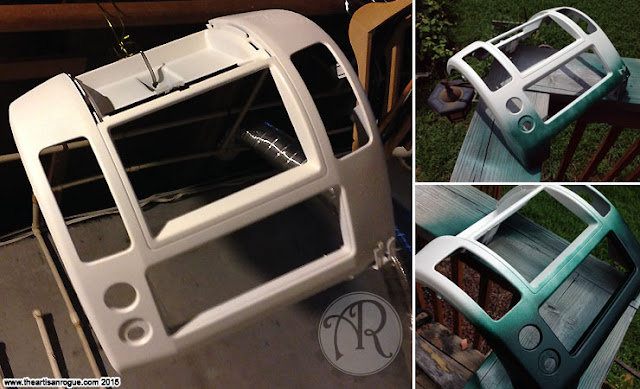
| The main section with all the parts removed got three coats of white primer put onto it, after I used some epoxy putty to resupport and fix the cracked area near the vent. Then I laid in the bottom emerald green color from the bottom up about 1/3 of the way. |
 |
| When that all dried, I took the X-Metal green and two coats of that later, the top half was finished up. Then I assembled back in all of the internal components. |
The final coating on it was a Krylon clear coat (only because I was out of Montana clear coat at the time... never making that mistake again). It came out alright, but Montana's clear coat is really really hard to beat, and even in extreme temps, functions and applies like a champ.
 |
| Final install. I love the extra splash of color the dash has from the front/top, and it installed pretty clean. |
This was a lot of fun to do, and even though it was just insane hot outside, I worked the best I could around that and overall, I think this was about $20 in materials, and about four hours of labor in taking it out, apart, and spraying it.
Anyway, I'll have more little 48 hour projects to showcase later on. Until next time!
- Mario, the Artisan Rogue


No comments:
Post a Comment